

Heres Some Camping Tips & Tricks at Your Fingertips
Our Sullivan Campground Blog is the information you need to make your next camping trip in Missouri even more enjoyable. From RV and camping tips and tricks, to amazing campfire recipes, to advice on planning your next trip in Sullivan, MO... the information below is here to help you. And please, feel free to comment and share your experiences, knowledge and favorite recipes. At Meramec Campground, we are a family and all here to help each other enjoy the great outdoors to the fullest!
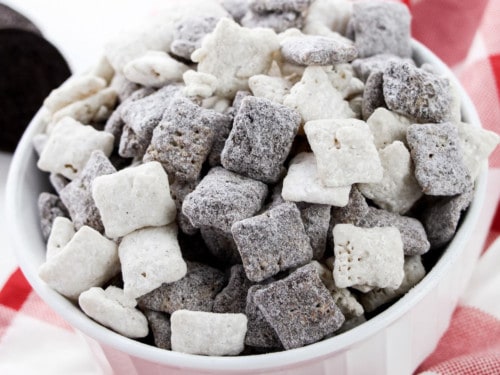
Cookies and Cream Muddy Buddies
Cookies and Cream Muddy Buddies are a delicious twist on the classic muddy buddies snack, also known as puppy chow. Here’s a simple recipe to make them:
Ingredients:
- 6 cups rice Chex cereal
- 1 cup white chocolate chips
- 1/4 cup butter
- 1 teaspoon vanilla extract
- 1 1/2 cups crushed chocolate sandwich cookies (like Oreos), divided
- 1 1/2 cups powdered sugar
Instructions:
- Place the Chex cereal in a large mixing bowl.
- In a microwave-safe bowl, melt the white chocolate chips and butter together in the microwave in 30-second intervals, stirring in between, until smooth.
- Stir in the vanilla extract into the melted white chocolate mixture.
- Pour the melted white chocolate mixture over the Chex cereal and gently stir until all the cereal is evenly coated.
- Add 1 cup of crushed chocolate sandwich cookies to the cereal mixture and gently stir to distribute them evenly.
- In a large zip-top bag, add the powdered sugar and remaining 1/2 cup of crushed chocolate sandwich cookies. Seal the bag and shake to mix the powdered sugar and cookies.
- Pour the coated cereal mixture into the bag with the powdered sugar and cookies. Seal the bag and shake until all the cereal pieces are coated with the powdered sugar mixture.
- Spread the Muddy Buddies out on a baking sheet to cool and set completely.
- Once cooled, transfer to an airtight container for storage.
Enjoy your Cookies and Cream Muddy Buddies as a tasty snack!
Try this recipe out on your next camping trip to Meramec Campground!
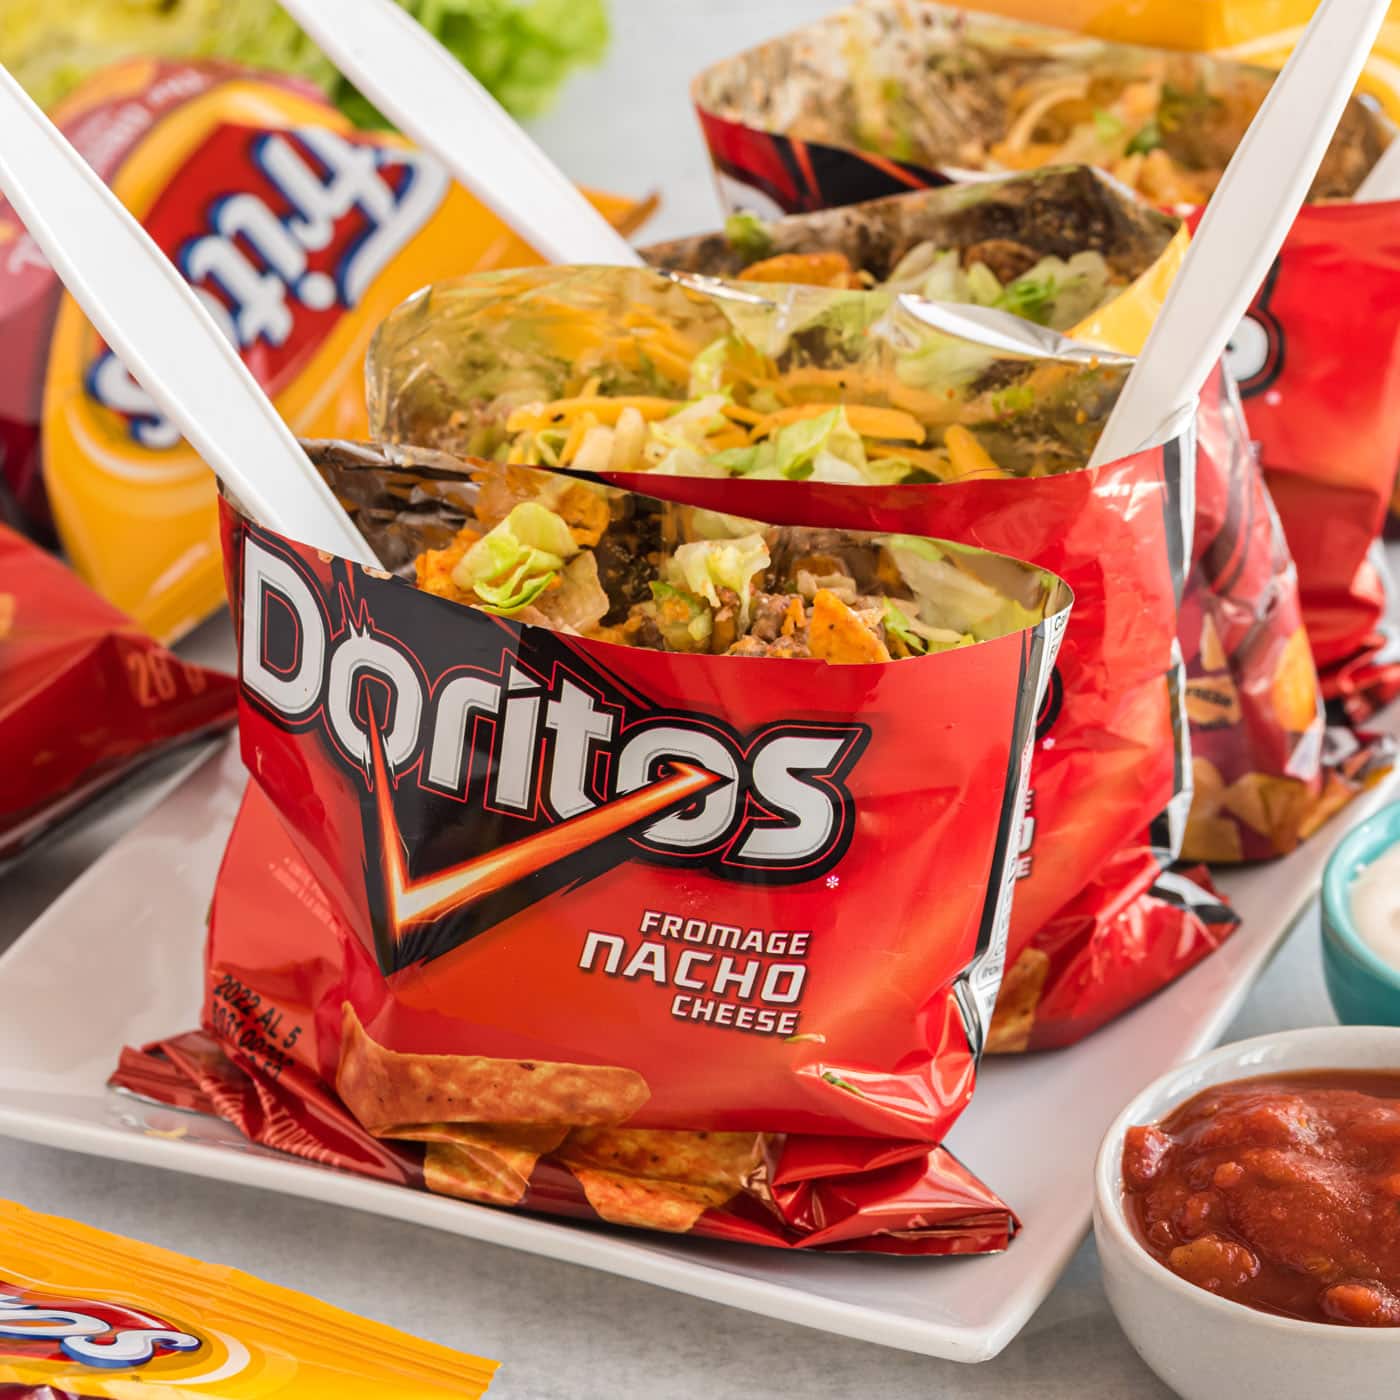
Taco in a Bag
“Taco in a bag” typically refers to a popular and convenient way of serving tacos, especially at events, fairs, or gatherings. It’s also known as a “walking taco” or “Frito pie.” The concept involves filling a small, individual-sized bag of corn chips (such as Fritos) with ingredients, creating a portable and easy-to-eat meal.
Here’s a basic recipe for making a taco in a bag:
Ingredients:
- Individual-sized bags of corn chips (e.g., Fritos)
- Cooked and seasoned taco meat (ground beef or alternative protein)
- Shredded lettuce
- Diced tomatoes
- Shredded cheese
- Salsa or pico de gallo
- Sour cream
- Optional toppings: sliced jalapeños, guacamole, onions, etc.
Instructions:
- Start by opening the bag of corn chips.
- Spoon in the cooked and seasoned taco meat.
- Add shredded lettuce, diced tomatoes, shredded cheese, salsa, and sour cream.
- If desired, top with additional ingredients like jalapeños, guacamole, or onions.
- Mix the ingredients gently within the bag.
- Use a fork or spoon to eat directly from the bag.
This concept is popular for its simplicity, versatility, and minimal mess, making it a great option for events where people are on the move or don’t have access to traditional taco plates.
The perfect recipe for the whole family to enjoy! Try it out on your next trip to Meramec Campground!
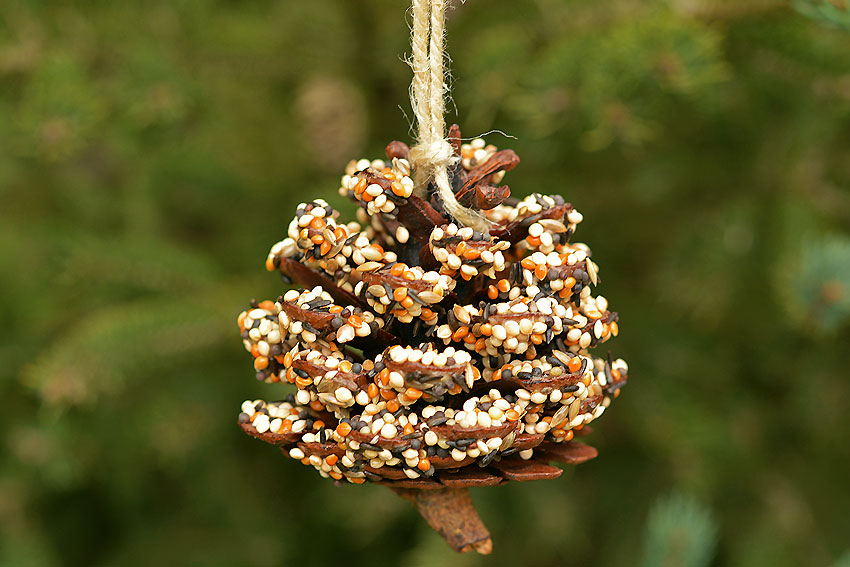
Pine Cone Bird Feeder
Creating a pine cone bird feeder is a simple and enjoyable craft that can attract birds to your garden or outdoor space. Here’s a basic guide on how to make one:
Materials:
- Pine cone(s)
- Peanut butter or vegetable shortening
- Birdseed
- String or twine
- Butter knife or spatula
- Plate or shallow dish
Instructions:
- Collect Pine Cones:
- Find pine cones in your yard, a local park, or purchase them from a craft store. Make sure they are clean and free of any pests.
- Clean and Dry Pine Cones:
- If the pine cones are dirty, gently clean them by shaking off loose debris or using a brush. Allow them to dry completely before starting the project.
- Prepare the Birdseed Mixture:
- In a plate or shallow dish, mix birdseed with peanut butter or vegetable shortening. The goal is to create a sticky mixture that will adhere to the pine cone.
- Coat the Pine Cone:
- Using a butter knife or spatula, spread the peanut butter or shortening mixture onto the pine cone, making sure to cover the scales well.
- Roll in Birdseed:
- Roll the coated pine cone in the birdseed until it is well-covered. Gently press the birdseed onto the pine cone to ensure it sticks.
- Attach String:
- Cut a piece of string or twine and tie it securely to the top of the pine cone. This will be used to hang the bird feeder.
- Hang the Bird Feeder:
- Find a suitable location to hang the bird feeder. It could be a tree branch, a shepherd’s hook, or any other elevated spot. Make sure it’s visible to birds and away from potential predators.
- Enjoy Watching Birds:
- Hang your pine cone bird feeder and wait for the birds to discover it. You might attract a variety of birds, depending on the type of seeds used.
Tips:
- Use natural peanut butter without added sugar or salt for a healthier option.
- Experiment with different types of bird seed to attract various bird species.
- Monitor the feeder regularly, replenishing the birdseed and cleaning the pine cone as needed.
This DIY pine cone bird feeder is a fun and eco-friendly way to provide nourishment for local birds while adding a decorative element to your outdoor space.
Try this fun activity with the kiddos on your next camping trip at Meramec Campground!
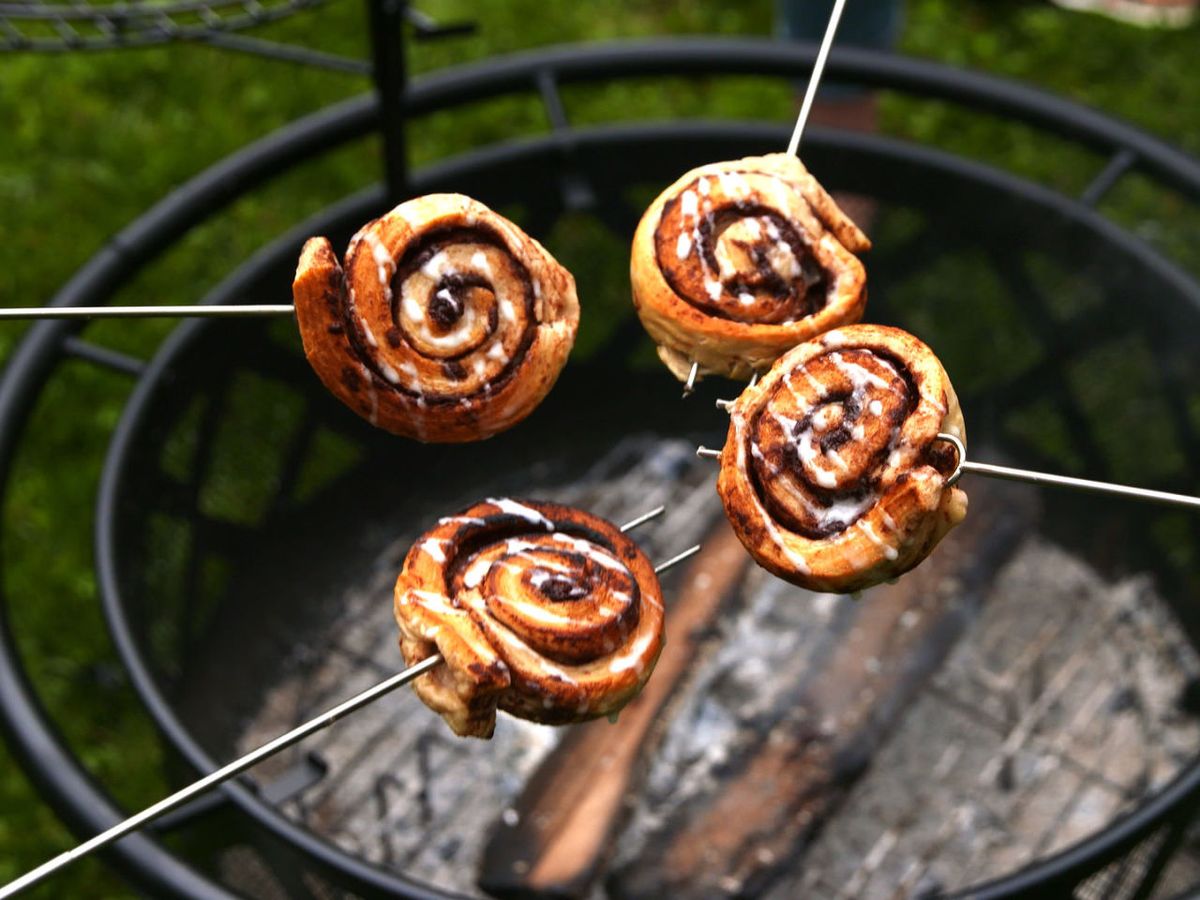
Campfire Cinnamon Rolls
Campfire cinnamon rolls are a delicious and fun twist on the classic cinnamon roll recipe, perfect for outdoor cooking and camping. Here’s a simple recipe for making campfire cinnamon rolls:
Ingredients:
- Pre-made cinnamon roll dough (store-bought or homemade)
- Cooking spray or oil for the cooking surface
- Campfire or grill with a grate
- Skewers or roasting sticks
Instructions:
- Prepare the Campfire:
- Start by building a campfire or heating up a grill. Allow it to burn down to a bed of hot coals.
- Skewer the Cinnamon Rolls:
- Take each cinnamon roll and carefully skewer it onto a roasting stick or metal skewer. Make sure to center it on the stick, leaving some space on either end.
- Grease the Cooking Surface:
- Spray the cooking surface (grate) with cooking spray or brush it with oil. This prevents the cinnamon rolls from sticking.
- Cooking Over the Campfire:
- Hold the skewered cinnamon rolls over the hot coals, rotating them consistently to ensure even cooking.
- Cooking times may vary, but it usually takes around 8-12 minutes for the rolls to cook thoroughly. Keep an eye on them to prevent burning.
- Check for Doneness:
- The cinnamon rolls are done when they are golden brown and cooked through. You can check the center with a skewer; if it comes out clean, they’re ready.
- Remove and Serve:
- Once cooked, carefully remove the skewered cinnamon rolls from the fire.
- Allow them to cool for a few minutes before serving.
- Optional: Icing:
- If your cinnamon roll dough comes with icing, you can drizzle it over the rolls for an extra touch of sweetness. If not, you can prepare a simple icing at home and bring it with you.
Remember to exercise caution when cooking over an open flame and supervise the process, especially if children are involved. Enjoy your delicious campfire cinnamon rolls!
Try this recipe for Campfire Cinnamon Rolls on your next trip to Meramec Campground!
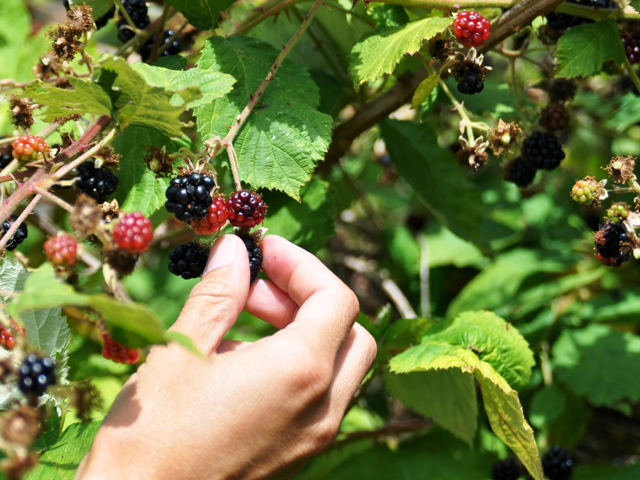
Testing whether a plant is edible
Testing whether a plant is edible is a critical skill, but it should be approached with caution. Misidentification of plants can lead to serious health issues or even be fatal. If you’re not absolutely certain about the edibility of a plant, do not consume it. It’s important to note that the information provided here is general guidance and should not replace thorough research or consultation with an expert in foraging or botany.
Here are some general guidelines for testing the edibility of a plant:
- Positive Identification:
- Use reliable field guides, plant identification apps, or consult with experts to positively identify the plant.
- Pay attention to the plant’s overall appearance, leaves, flowers, and any distinctive features.
- Edibility Resources:
- Refer to reputable sources on edible plants in your region, such as local foraging guides, ethnobotanical studies, or websites provided by knowledgeable organizations.
- Plant Parts:
- Some plants may have edible parts while other parts are toxic. Ensure you know which parts are safe to consume.
- Look for Warning Signs:
- Avoid plants with a bitter or soapy taste, a strong odor, or those that cause irritation when touched.
- Plants with milky sap or brightly colored berries may be toxic.
- Allergies:
- Be aware of any allergies you may have to plants or related species.
- Universal Edibility Test:
- This is a last resort and is not foolproof. It involves testing a small part of the plant and waiting 8 hours to see if there is any adverse reaction before consuming more. The process is complex and may not be suitable for all plants.
- Local Knowledge:
- If you are in a new area, consult with local experts, indigenous communities, or experienced foragers who may have traditional knowledge about edible plants.
- Seasonal Considerations:
- The edibility of some plants may change with the seasons. For example, some plants may be safe to eat in the spring but become toxic in the summer.
Remember, the safest approach is to learn from experienced foragers or botanists in your area before attempting to forage on your own. Never consume a plant unless you are absolutely sure of its identity and edibility. If in doubt, it’s better to err on the side of caution and not consume the plant.
At Meramec Campground we share this information for learning purposes. Please do not eat plants that you are not familiar with. Please be cautious and safe when handling unfamiliar plants.
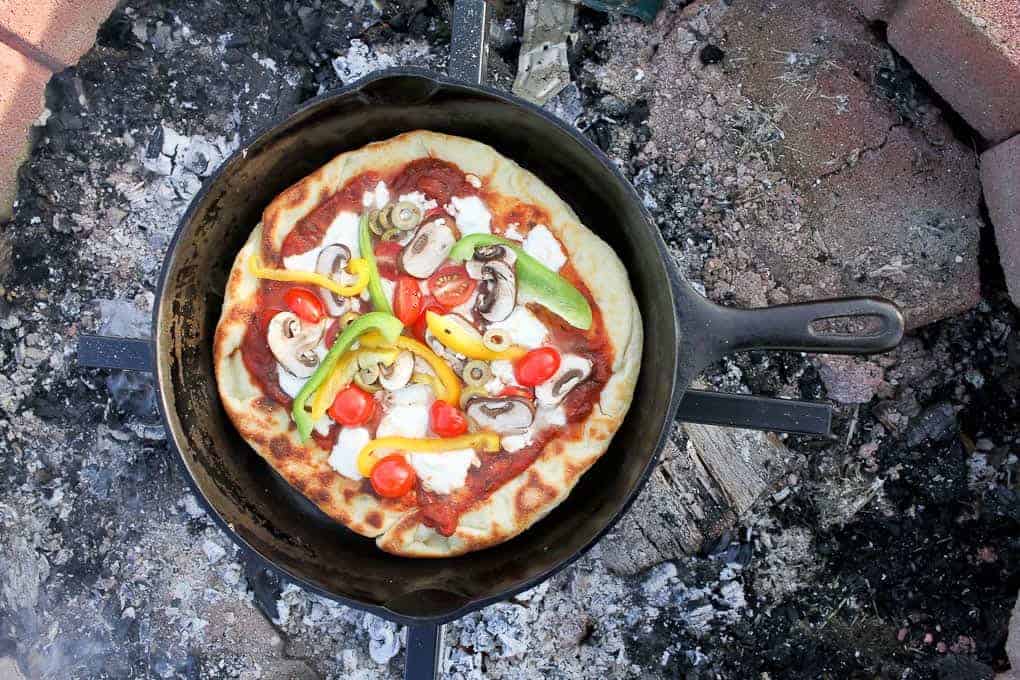
Campfire Pizza
Campfire pizza is a delicious and fun variation of traditional pizza that you can make while camping. Here’s a simple recipe for making campfire pizza:
Ingredients:
- Pizza dough (pre-made or homemade)
- Pizza sauce
- Cheese (mozzarella or your preferred type)
- Toppings of your choice (e.g., pepperoni, bell peppers, onions, mushrooms)
Instructions:
- Prepare the Campfire:
- Build a campfire and let it burn down until you have a good bed of hot coals. You’ll be cooking the pizza over these hot coals.
- Roll Out the Dough:
- Roll out your pizza dough on a flat surface. You can pre-make the dough at home or purchase pre-made dough for convenience.
- Assemble the Pizza:
- Spread pizza sauce over the rolled-out dough, leaving a small border for the crust.
- Add a generous layer of cheese and your favorite toppings.
- Cooking Over the Campfire:
- Place the assembled pizza on a grate or a flat, heat-resistant surface over the hot coals. You can use a cast-iron skillet or a grill grate.
- Cover the pizza with a lid or foil to help melt the cheese and cook the toppings. Cooking time will vary depending on the heat of your campfire, but it typically takes around 10-15 minutes.
- Check and Rotate:
- Check the pizza occasionally to ensure it’s cooking evenly. You may need to rotate it to cook all sides evenly.
- Enjoy!
- Once the cheese is melted, and the crust is cooked to your liking, carefully remove the pizza from the fire.
Remember to be cautious when cooking over an open flame, and have the necessary tools to handle hot surfaces. Campfire pizza is a versatile dish, and you can get creative with your toppings to suit your preferences. It’s a great way to enjoy a homemade meal while camping and adds a fun twist to the camping experience.
Try out this family-fun recipe for Campfire Pizza on your next camping trip to Meramec Campground!
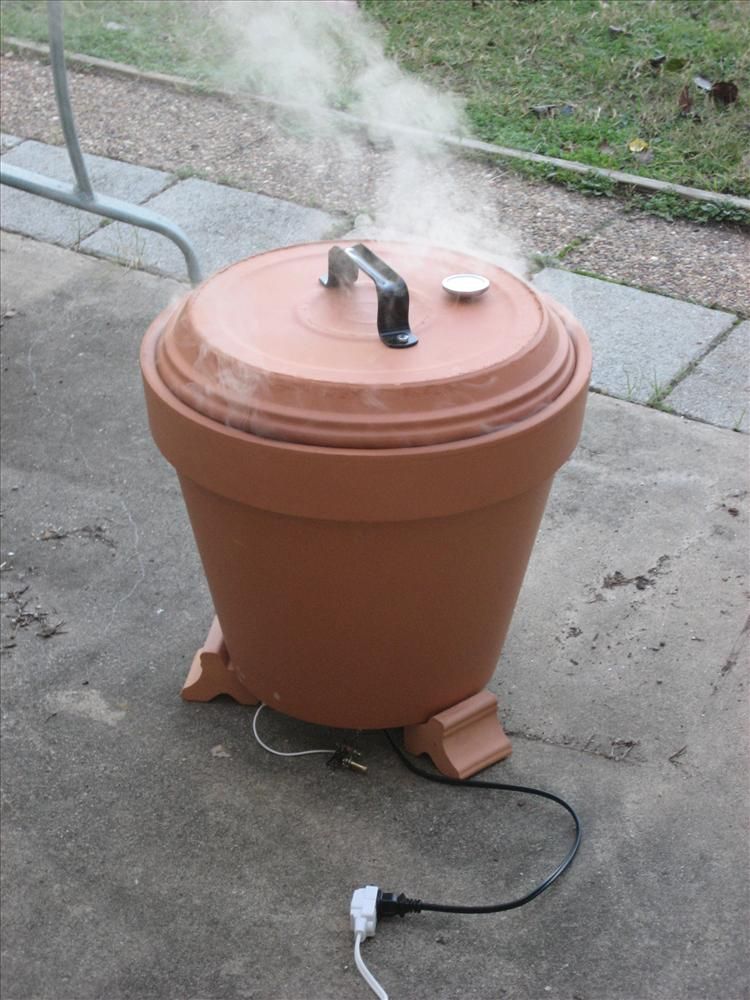
DIY Flower Pot Smoker
Creating a flower pot smoker is a popular and cost-effective way to enjoy smoking food at home. Here’s a simple guide on how to make a DIY flower pot smoker:
Materials:
- Large terracotta flower pot (at least 16 inches in diameter)
- Large saucer or tray for the bottom of the pot
- Cooking grate or rack that fits inside the pot
- Charcoal pan or a disposable aluminum foil pan
- Charcoal
- Wood chips for smoking (such as apple or hickory)
- Cooking thermometer
- Drill with a 1/4-inch drill bit
- Tin snips (if needed)
- High-temperature grill paint (optional)
Instructions:
- Prepare the Flower Pot:
- Make sure the terracotta flower pot and saucer are clean and free of any coatings or residues.
- If desired, you can spray the outside of the pot with high-temperature grill paint for a finished look.
- Drill Ventilation Holes:
- Using the drill and a 1/4-inch drill bit, create several holes around the bottom rim of the flower pot for ventilation. These holes will allow air to flow into the smoker to keep the charcoal burning.
- Create the Charcoal Pan:
- Place the charcoal pan or aluminum foil pan in the center of the saucer. This will hold the charcoal and catch any ashes.
- If you’re using an aluminum foil pan, you may need to cut it down to size with tin snips.
- Add Charcoal:
- Fill the charcoal pan with charcoal. You can use either lump charcoal or briquettes.
- Add Wood Chips:
- Soak the wood chips in water for about 30 minutes, then sprinkle them over the charcoal. This will create smoke and add flavor to your food.
- Place the Cooking Grate:
- Put the cooking grate or rack on top of the flower pot. This is where you’ll place the food.
- Set Up the Temperature Control:
- Adjust the airflow by partially covering some of the ventilation holes to control the temperature. You can use a small piece of aluminum foil to cover the holes as needed.
- Start Smoking:
- Light the charcoal and allow it to burn until it’s covered with white ash. Place your food on the cooking grate.
- Monitor Temperature:
- Use a cooking thermometer to monitor the temperature inside the smoker. You may need to adjust the airflow or add more charcoal to maintain the desired temperature.
- Enjoy Your Smoked Food:
- Smoke your food until it reaches the desired level of doneness, and enjoy the delicious flavors you’ve created.
Remember to always follow proper safety precautions when using a smoker, such as placing it on a fire-resistant surface, keeping it away from flammable materials, and never leaving it unattended while in use.
Try out your DIY smoker on your next camping trip to Meramec Campground!

Brownie Batter Puppy Chow
Brownie batter puppy chow, also known as “Muddy Buddies,” is a delicious and easy-to-make snack that combines the flavors of brownies and the irresistible crunch of cereal. Here’s a simple recipe to make this sweet treat:
Ingredients:
- 9 cups Chex cereal (you can use rice, corn, or wheat Chex)
- 1 cup semisweet chocolate chips
- 1/2 cup unsalted butter
- 1/4 cup unsweetened cocoa powder
- 1 teaspoon vanilla extract
- 2 cups powdered sugar
- 1 cup brownie mix (dry mix, not prepared batter)
- 1/2 cup mini chocolate chips (optional, for extra chocolatey goodness)
Instructions:
- Place the Chex cereal in a large mixing bowl and set it aside.
- In a microwave-safe bowl, combine the semisweet chocolate chips and butter. Microwave in 30-second intervals, stirring between each interval, until the chocolate and butter are fully melted and well combined.
- Stir in the unsweetened cocoa powder and vanilla extract into the melted chocolate mixture until it forms a smooth and glossy chocolate sauce.
- Pour the chocolate sauce over the Chex cereal in the large mixing bowl. Gently fold and stir until all the cereal is evenly coated with the chocolate mixture.
- In a large resealable plastic bag, combine the powdered sugar and brownie mix. Seal the bag and shake it well to mix the dry ingredients thoroughly.
- Carefully transfer the chocolate-coated Chex cereal into the resealable bag with the powdered sugar and brownie mix. Seal the bag, making sure it’s closed tightly, and shake it vigorously until the cereal is evenly coated with the sweet, brownie-flavored mixture.
- If you’re using mini chocolate chips, you can mix them into the puppy chow at this point for extra chocolatey goodness.
- Spread the brownie batter puppy chow onto a baking sheet lined with parchment paper or wax paper to cool and set. Allow it to cool completely, which may take about 30 minutes.
- Once it’s cooled and set, you can break the puppy chow into bite-sized clusters, and it’s ready to be enjoyed!
Brownie batter puppy chow is a delicious, sweet, and crunchy snack that’s perfect for parties, movie nights, or any time you’re craving a chocolaty treat. Enjoy!
Enjoy this sweet treat while camping at Meramec Campground!
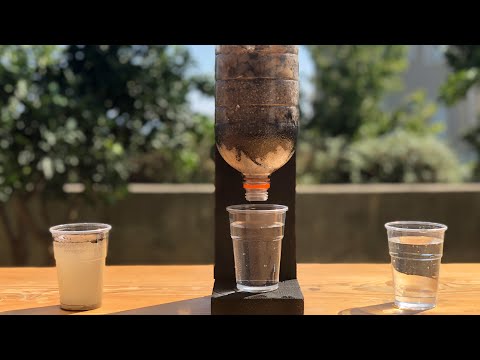
How to Filter Water
Filtering water is an important process to remove impurities, contaminants, and particles to make it safe for drinking and other uses. There are several methods to filter water, ranging from simple household methods to more complex industrial processes. Here are some common ways to filter water:
Ways to Filter
- Boiling: Boiling water is one of the simplest and most effective ways to kill harmful microorganisms like bacteria and viruses. Boiling water for at least one minute (or longer at high altitudes) can make it safe to drink. However, this method does not remove chemical contaminants or suspended particles.
- Use of Commercial Water Filters: a. Activated Carbon Filters: These filters are common in water pitchers, faucet attachments, and under-sink filtration systems. They remove chlorine, bad tastes, odors, and some chemicals. b. Reverse Osmosis Filters: These systems use a semipermeable membrane to remove a wide range of contaminants, including minerals, heavy metals, and bacteria. c. Ultraviolet (UV) Filters: UV filters use UV radiation to kill bacteria and viruses, making the water safe to drink. However, they do not remove physical particles or chemical contaminants. d. Ceramic Filters: These filters have small pores that can remove bacteria, sediment, and other particles.
- Gravity Filters: These are portable devices that use gravity to pass water through a filtration medium. They are often used for outdoor activities and emergency situations.
- Sand Filters: Sand filters are effective in removing larger particles and debris. They are commonly used in swimming pools and in some wastewater treatment processes.
- Activated Alumina Filters: These filters are used to remove fluoride and arsenic from drinking water.
- Distillation: Distillation involves heating water to create steam and then condensing the steam back into water. This process effectively removes impurities, leaving behind contaminants. However, it can be energy-intensive.
- Chemical Treatment: Adding chemicals such as chlorine or iodine to water can disinfect it and kill microorganisms. However, this doesn’t physically remove particles or contaminants and may leave a taste or odor.
- DIY Filtration: In emergency situations or for camping, you can create a makeshift filter using materials like cloth, sand, charcoal, and gravel in layers to remove particles and some impurities. This method is not as reliable as commercial filters.
Tips
When choosing a water filtration method, consider the specific contaminants in your water source and your filtration goals. It’s essential to regularly maintain and replace filter components to ensure their continued effectiveness. Additionally, some methods like boiling or distillation are best combined with others to provide comprehensive water purification. Always follow local guidelines and recommendations for water treatment to ensure the water’s safety for consumption.
recommendations for water treatment to ensure the water’s safety for consumption.
It’s always great to learn new survival tips in case of a zombie apocalypse. At Meramec Campground we learn together, we survive together!
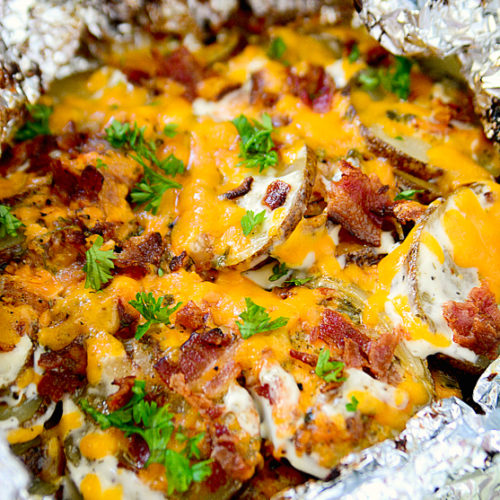
Cheesy Ranch Potato Foil Pack
Campfire Cheesy Ranch Potato Foil Pack is a delicious and easy-to-make camping recipe that combines potatoes, cheese, and ranch seasoning cooked over an open flame or campfire. Here’s a basic recipe to get you started:
Ingredients:
- 4 medium-sized potatoes, thinly sliced
- 1 cup shredded cheddar cheese
- 1/2 cup grated Parmesan cheese
- 1 packet (1 ounce) ranch seasoning mix
- 1/4 cup butter, cut into small cubes
- Salt and pepper to taste
- Cooking spray
- Heavy-duty aluminum foil
Instructions:
- Prepare the Campfire: Start by building a campfire and allowing it to burn down to hot coals. You’ll want a medium-high heat for cooking these foil packs.
- Prep the Foil Packs: Tear off four large squares of heavy-duty aluminum foil, each about 12-16 inches long. Spray the center of each piece of foil with cooking spray to prevent sticking.
- Layer the Ingredients: On each piece of foil, place a portion of the sliced potatoes. Sprinkle with salt and pepper to taste.
- Add Seasoning: Sprinkle the ranch seasoning mix evenly over the potatoes on each foil square.
- Add Cheese: Layer shredded cheddar and grated Parmesan cheese on top of the potatoes.
- Add Butter: Distribute the small cubes of butter evenly over the cheese.
- Seal the Foil Packs: Carefully fold the sides of the foil over the potato mixture and seal the edges tightly to create a packet. Make sure the packets are well sealed to trap steam and cook the potatoes evenly.
- Cook Over the Campfire: Place the foil packs on the hot coals of the campfire. Cook for about 15-20 minutes, turning the packets occasionally to ensure even cooking. Cooking times may vary depending on the heat of your campfire, so check for doneness by carefully opening one packet and testing the potatoes with a fork. They should be tender.
- Serve: Once the potatoes are tender and the cheese is melted and gooey, carefully remove the foil packs from the campfire. Let them cool for a minute or two before opening, as they will be very hot. Serve the cheesy ranch potato foil packs directly in the foil or transfer them to plates.
These campfire cheesy ranch potato foil packs are a hearty and satisfying camping meal. You can customize them by adding other ingredients like diced onions, bell peppers, or even some cooked bacon bits for extra flavor. Enjoy your outdoor cooking adventure!
On your next trip to Meramec Campground, try out this gooey recipe!

Family owned and operated, Kiefer Campgrounds strive to offer you the best rates for a comfortable location with outstanding service, and spotless facilities. When you stay in one of our parks, you are no longer just a happy camper, but a part of our family! We are most certain you will enjoy your stay with us. Pick your favorite location and book your spot now before it’s too late! You’ll be happy you did!